How to Configure FleetProxy in XLogin Browser: Step-by-Step Guide
Integrations08/09/2025, 23:362 min read
XLogin Antidetect Browser is a browser designed to protect against linking multiple accounts. It emulates several real physical devices by creating multiple virtual profiles, modifying browser fingerprints, and allowing users to run an unlimited number of accounts on one device without detection.
XLogin supports global websites and platforms and is applicable to all types of browser-based businesses, such as Google, Facebook, Twitter, Amazon, eBay, Etsy, TikTok, Tinder, PayPal, Stripe, Outlook, Gmail, and other online platforms. It is suitable for account registration, ad verification, store operations, affiliate marketing, automation, and other industries.
A free 3-day trial is available for new users!
✔️ Separate and independent browser environments
✔️ Protection for multiple browser fingerprints
✔️ Easy multi-account management
✔️ Convenient browser automation
✔️ Efficient team collaboration
✔️ Overcome device and geolocation restrictions
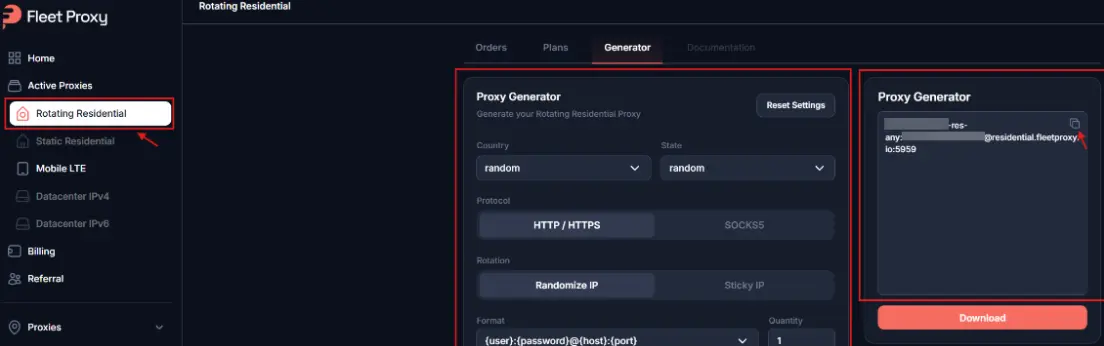
Step 1: Generate Proxy in FleetProxy Dashboard
Log in to your FleetProxy dashboard and navigate to Rotating Residential from the sidebar. Under the Generator tab, choose your preferred:
- Country and State
- Protocol (HTTP / HTTPS or SOCKS5)
- Rotation type (Randomize IP or Sticky IP)
Once done, the complete proxy string will appear in the right-hand box; click the copy icon to copy it. Click the copy icon to copy the full proxy string. FleetProxy’s generator tool allows full control over proxy location and behaviour, ideal for users managing ad verification, SEO tracking, or anti-detection browsing. Whether you're working on stealth marketing or automation, these rotating IPs help you stay completely anonymous.
Read Also: 7 Use Cases for High-Speed Rotating Residential Proxies
Now, let’s return to XLogin and paste the credentials.
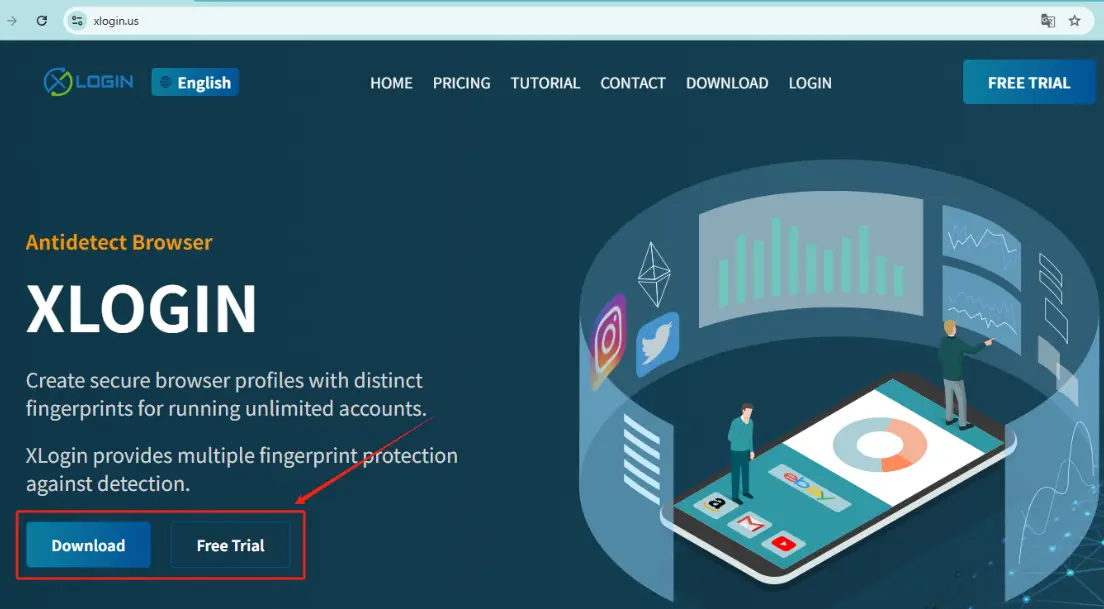
Step 2: Set Up Your XLogin Browser Profile
1. Register and Download to the XLogin. (Supprot Free Trial)
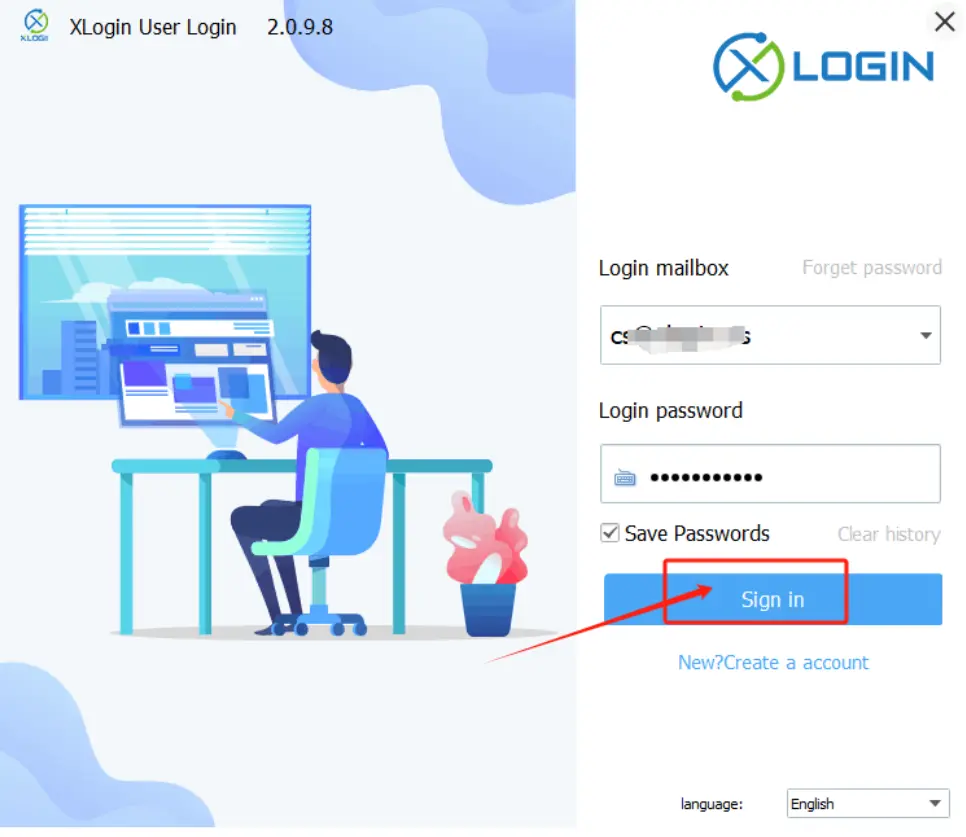
Step 3: Launch the XLogin client and Login.
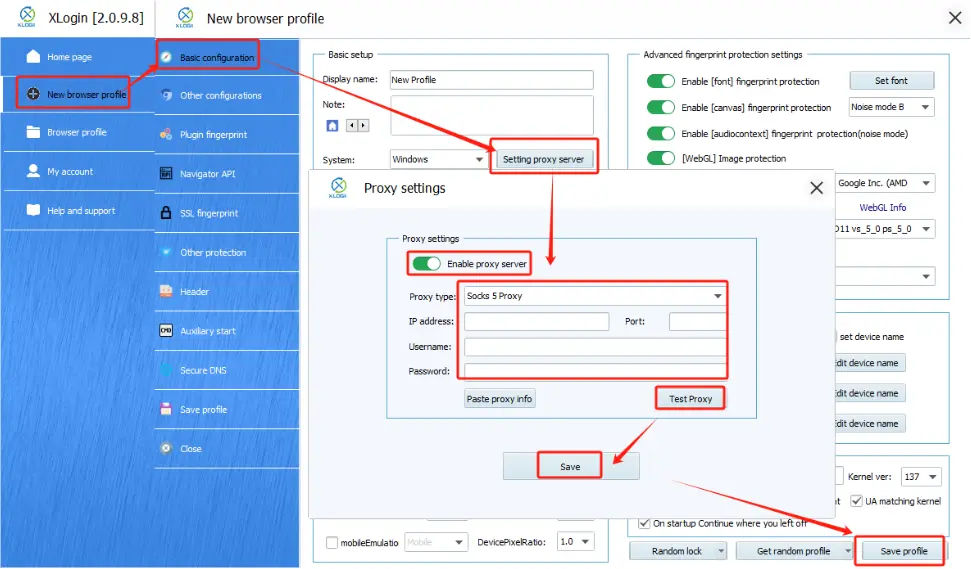
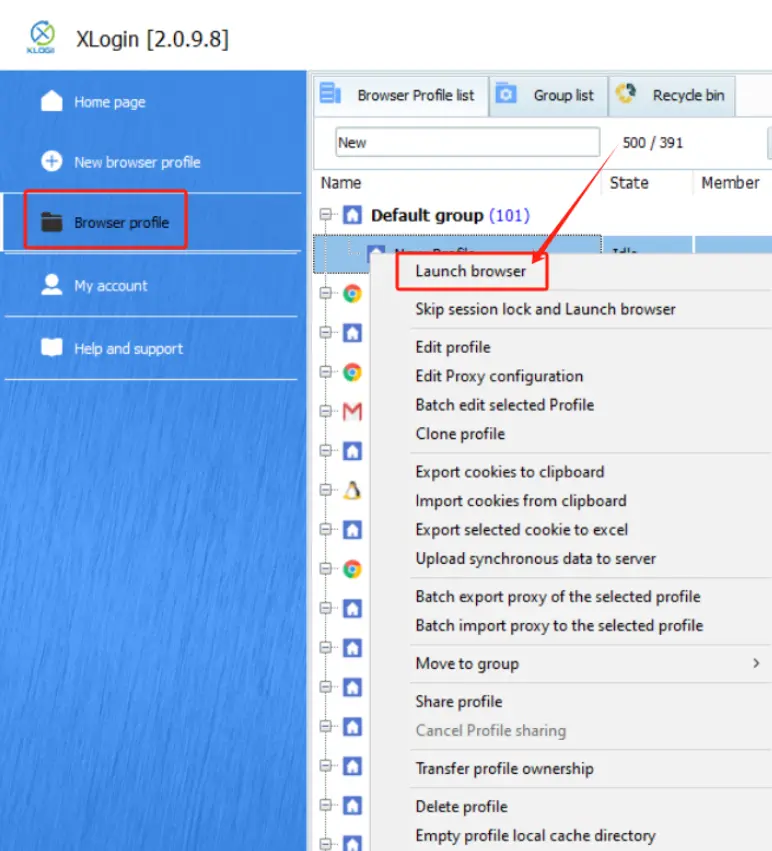
Step 4: Click “New browser profile” to create the profile.
1. Fill in a display name and configure the browser fingerprint settings.
2. Navigate to the “Setting proxy server” section within the profile.
3. Enable proxy server.
4. Paste the IP:Port:Username:Password or enter the Fleetproxy information:
(1) Choose the correct proxy type (e.g., HTTP, SOCKS5).
(2) Enter the IP address and port.
(3) Enter the username and password if required.
(4) Click “Test Proxy” to ensure the connection works.
(5) Save the proxy settings, then save the profile.
Also Read: FleetProxy with VMLogin Browser
Step 5: Launch the profile.
Ready to try FleetProxy?
Residential proxies from $2.65/GB on real IPs across 100+ countries. Instant activation with 24/7 expert support.
Get StartedReady to try FleetProxy?
Residential proxies from $2.65/GB on real IPs across 100+ countries. Instant activation with 24/7 expert support.
Get StartedMore popular posts
Tips to Use a JP Web Proxy to Browse Japanese Websites Safely.
Have you ever clicked on a link to an exciting Japanese video, a regional news article, or a unique e-commerce site, only to be met with a frustrating error message? "This content is not available in your region." This digital barrier, known as geo-blocking, is a common hurdle for international fans of Japanese culture, researchers, and expats alike.

How to Use SOCKS5 Proxy on iPhone
SOCKS5 proxy is a safe connection protocol that directs your internet traffic over another server. This server covers your actual IP address and provides a new one.
How much does an IP address cost in 2025?
The IP address cost in 2025 varies across regions. Larger blocks are cheaper per IP but costly overall, while smaller blocks offer more stability, clarity and security. No matter the option, understanding these trends helps businesses make smarter and more cost-effective decisions